

How to brew great-tasting coffee on holiday - our essential tips

If you care about coffee, being away from your normal setup at home shouldn’t mean compromising on quality. If you’re a coffee geek, a barista travelling light, or just someone who refuses to settle for terrible hotel coffee, you can still brew a great coffee while on the go, it may just need a bit of planning.
You don’t need to bring your Mahlkönig X54 grinder or plumb in a Linea Mini at your Airbnb. A few compact tools, thoughtful prep, and a good approach to water will get you to a brew you can be genuinely happy to drink. Here's what we recommend for brewing when travelling.
First up: Can I bring coffee beans on a plane?
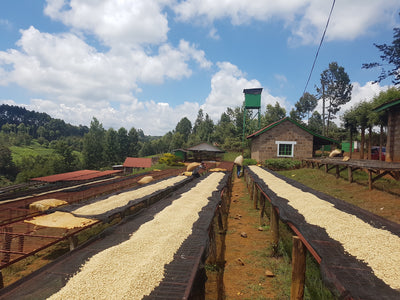
Yes, roasted coffee beans are fine in both carry-on and checked luggage. They aren’t considered a prohibited food item or restricted agricultural product in most countries, though if you’re travelling internationally, double-check the import rules at your destination (especially if it’s a country with strict agricultural controls).
For freshness, store beans in your cabin bag in a sealed, airtight container. Avoid exposing them to heat, humidity, or sunlight; airport lounges and rental cars can easily push your beans toward going stale prematurely if you’re not careful.
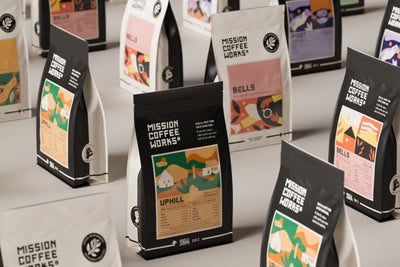
Beans: Whole is best, but pre-ground can work if you plan for it
Whole beans are the obvious choice if you want to retain flavour and complexity. If you can bring a travel-sized grinder like the Comandante or the Timemore Chestnut S3, you’ll get the most out of your coffee wherever you go.
That said, pre-ground coffee can still deliver a good brew, provided it’s portioned and stored well. You might want to pre-dose your coffee into individual brew-sized bags to minimise oxidation and exposure, though it’s not 100% necessary.
Brewing gear: Lightweight doesn’t have to mean low-quality
There’s no need to downgrade your technique just because you’re travelling. Most hotels or B&Bs will have kettles in the room (though not of the goose neck variety). So with that in mind, a few key pieces of compact equipment can replicate most of what you’d do at home:
-
AeroPress Go: The obvious all-rounder. Packs small, cleans easily, works with a wide range of grinds, and brews everything from short and punchy to long and clean. The Go kit even includes a cup and lid. Here’s a link to our brew guides if you haven’t brewed with AeroPress before.
-
Clever Dripper: If you prefer brews with a filter profile, this is a solid choice. You can brew delicious, pour-over-style coffee with ease - a brilliantly simple immersion brewer that combines the best of V60 clarity with the richness of full immersion.
-
Reusable pods: If your accommodation only offers a Nespresso or similar pod machine, pre-loading your own with quality coffee in reusable pods is a decent workaround. You may need to experiment a little with ratio and how hard you pack the coffee, but it can create a delicious brew.
-
Scales: A pocket-sized scale like the Timemore Nano makes all the difference if you want consistency. If you’re tight on space, at least mark water levels on your brewing vessel before your trip using test brews at home. Knowing where 200ml or 250ml lands in your kit can keep your brews roughly on track even without weighing every dose.
Check your accommodation specs before you travel so you know which brew method will work best for you. Don’t forget your filters (AeroPress or Filtropa #4, depending on your setup). Bring more than you think you’ll need, they take up no space and are hard to source in unfamiliar cities.
Water: Don’t ignore the variable that makes up 98% of the cup
You know the drill: bad water = bad coffee. You might have perfect beans and a great grinder, but if you're using heavily chlorinated tap water or something with the wrong mineral levels and off flavours, you’re not going to get clarity or balance in the cup.
Use bottled water wherever possible, ideally low-mineral water with calcium and magnesium levels that support extraction but don’t mute acidity or flatten the body. Check the label - many brands publish full mineral breakdowns. You want to look for:
-
Calcium: 10–50 mg/L
-
Magnesium: 5–30 mg/L
-
Sodium: <10 mg/L
-
Bicarbonates: 30–70 mg/L
-
Dry residue at 180C: around 150 mg/L
If you’re going all-in, Third Wave Water sachets are a great travel companion. Add one to a bottle of distilled or RO water and you’ve got a near-optimal brew base, no guesswork required. They weigh nothing and take up no space.
Additional packing tips
-
Bring a tea towel: You’ll want something to dry your gear or clean up, especially if you’re brewing in a hotel bathroom or on a balcony table.
-
Label everything: Especially if you’re bringing multiple origins or preground doses. A Sharpie and masking tape go a long way.
-
Consider temperature: If you’re going to a high-altitude or colder region, remember your extraction times and grind might need adjusting.
The takeaway
Great coffee while travelling isn’t about perfection, it’s about maintaining a standard that still respects the effort that went into the beans. But there’s no reason to sacrifice cup quality just because you’re away from home. Your location might change, but your brew can stay consistently excellent. Pack well, plan ahead, and keep your standards high. You and whoever you’re travelling with will thank you.
And if you can’t be bothered with “all this faff” - find the busiest coffee shop in the neighbourhood and do like the locals.


Leave a comment